Sunday, September 24, 2017

Accordion Foldables!

Hey everyone, I wanted to quickly post all about how I use paper accordion foldables to show sequence in my classroom. I meant to do it ages ago and totally forgot! Foldables are a great way to pull away from traditional worksheets and create new and engaging opportunities for students to show their understanding. We use them often in my classroom to show sequence in both Social Studies or Language Arts. Below you can see how by simply taking a single piece of construction paper, you can fold it into a booklet that when pulled reveals so much more!

This example below is from my Farm to Table unit on TPT. Students read about how eggs travel from from the farm to the table! They then sort the different events in the process in order from beginning to end! I provide each student with a 9x12 construction paper that I've sliced in half and folded into sixths. They then overlap and glue two of the sections together to create a little booklet.


In this unit, students glue the different steps in the process to the booklet and number them from beginning to end. Sometimes, I use it as a way for students to explore text. They highlight the different steps in the passage and then can refer back to the passage when working on their foldable. Other times, I use it as the end assessment to see if students have understood our week long study on eggs! Below you can see what a finished product might look like! For students who struggle with the foldable or when I run out of time as all teachers do, I will also sequence stories or content like the example in the bottom of the picture! Students can still enjoy the process of sorting the steps in sequence in a way in a way that allows for them to see the finished process in front of them. 


I love how foldables can make the material come alive in a very hands on way!


Monday, January 23, 2017

Flat Second Graders

This year, our Diocese has been focusing on utilizing anchor texts to drive our Language Arts instruction. We've been attempting to dig deep, expand our students' comprehension, and make stronger connections between varying levels and genres of text.

My Teacher Model
One of the anchor texts that second grade focused on this year was "Flat Stanley's Original Adventure" by Jeff Brown. Now there are many people who absolutely love this book! I am not typically one of them. I, overall, find the themes in it to be a tad boring and lacking in depth. However, I still read it every single year. What it lacks in depth, it makes up for in its ability to inspire struggling readers to pick up a brand new series with confidence.

Student example
This was the first year however, that I did not read the story in passing, but rather delved deeper into it. We compared Stanley's experience of being shipped to that of the title characher, May, in the book, "Mailing May" by Michael O. Tunnel. We looked at how our world is geographically laid out. We practiced understanding and creating maps of our own, while reading, "Me on a Map" by Joan Sweeney and "Mapping Penny's World" by Loreen Leedy. Also, we reflected on Stanley's kindness to those around him, and discussed how everyone in the world deserves to be teated with such kindness, regardless of their differences. We then used it as opportunity to think about some of the other places in the world Stanley might visit througout the remaining books in the series.

It was remarkable to me that when a simple story was paired properly with other texts, it suddenly became exceptionally more meaningfully. You can see what I mean by looking at the projects below.


We ended our text set by applying what we'd learned and had been working on into a summative project. As you probably noticed, my Flat Stanley project is a bit different than the typical Flat Stanley project that you might have seen on Pinterest. We didn't send anything in the mail, nor did we connect with other classrooms around the country.

Instead, students went to the school library and picked out a nonfiction book in their reading range about a place of their choosing. They used nonfiction text features to explore the book, and they read to find the main idea in each paragraph. Finally, they wrote a postcard, pretending that their flat-selves were visiting that particular location. The students compiled an image they drew of their flat-selves, interesting facts, and the front and back of postcards into a fun collage that they later presented to the class.

We called it the Flat Second Grader Project! I love how they turned out! I definitely enjoyed my first experience with anchor texts!


Wednesday, November 2, 2016

Monster Movies!

Recently on Instagram, I posted one of my new favorite projects for the month of October, Monster Movies!


Last year, I had my students create monster videos, using the app Chatterpix. At the time, my students were struggling with character traits, and chatterpix lended itself perfectly to helping my students create monsters with clear and specific character traits. However, this year's class is struggling more with basic story plot, specifically with understanding the difference between beginning, middle and end. So as any teacher would do, we made a new type of movie! 

We used the app Stop Motion Studio to create short monster movies with a clear beginning, middle and end! Students designed their stories and created simple Story boards. They then filmed them, making sure to barely move their monsters while they took the pictures! When all was done, they presented them to the class, making sure to point out the clear Beginning, Middle and End. Here you can see a picture of how they created their monster studios!


This app is incredible and so easy to use! I recommend it to everyone! I love that my little Second graders could use it in seconds! Check out three of our final videos below! They're super short but super cute! 

The Dance Off

The Great Escape

   
Soccer Friends 

I love how in that last one, the one monster gets hurt while playing soccer and his friend helps him up! So adorable! Definitely going to be using this app more this year!


Sunday, September 11, 2016

Another Year! Another Start!


Brag Tags, Bulletin Boards and Back to School goodies!! 
My Writing Wall, Birthday Board, Art Boxes and Class Library!  
       Happy Sunday! As we get ready to start our fifth week, I can't believe how much we've done! Boy, have we been busy! I finally had a chance to post, so get ready for a long one!

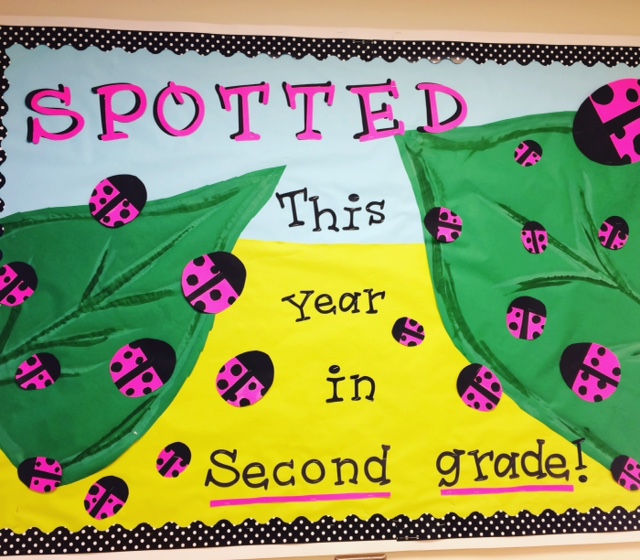
Spotted this year in Second grade is not only a brand new class of students but a freshly made Back to School bulletin board!!! This year I went with the ladybug theme for my board. I hand cut and glued 25 ladybugs on neon pink paper and cut out a fun saying using my cricut.  Although its not in this picture, each lady bug now has a student's name written in silver sharpie on the center black strip. The board is bright and extra cheerful!

I also took the time to update my birthday board, create fun new labels for my student art boxes and to switch my typical AR board to a BRAG tag board! That's right! I finally jumped on board (Pun intended! lol!) with BRAG tags!

Brag tag Board! 

Brag Tags

My friend, Isobel, came up with an amazing way to twist Brag tags to best fit our school, so that we can keep our traditional behavior system while still offering them as positive incentives for hard work! If you've read my blog before, you'll know that my school focuses on encouraging student reading, mastery of learning material and growth mindset each year by utilizing technology and celebration! Students in the past have received stickers for books that they've read, class dance breaks for learning, and lunch with the teacher for hard work, effort and overall kindness to others.

So with Isobel's amazing idea, we're taking our traditional AR boards and turning them into celebration boards, using brag tags. Students receive indivudal brag tags for reading AR books, passing levels in our differentiated software (ST MATH and LEXIA), caring for others, learning from their mistakes and extra hard work and effort! Everyone in the class at the same time will receive tags for mastering tricky material, finishing up fun projects, learning our prayers, and getting compliments from other teachers or admin! They will also be getting beads they can add to their tag necklaces for winning pod points. We'll be keeping our traditional behavior system but utilizing brag tags as a way to celebrate master and offer that extra positive incentive. I'm excited to see how it goes!

Bulletin Boards

My classroom has an endless amount of bulletin boards. This year, in addition to taping student work onto cabinets, doors, and windows,  I will be utilizing two boards for student work. The first board is nearly the same from last year, except that I added those adorable pencil clips from the Dollar Spot at Target! Here you can see them holding up one of my favorite Back to School activities: "I am excited to "BEE" in Second Grade." The cute bee craft is from Rhonda Baldacchino on TPT. However, I changed the paper he's holding! 

The Second bulletin board currently has my favorite new Back to School activity, using Emojis! I printed off some adorable clipart from Teachers Resource Force and had students cut out the face parts and glue them on yellow paper plates! They then had to write a sentence about Second grade during the first week. On the back of the plates they wrote reasons for those feelings. I didn't know what to expect when we started the project, but I couldn't have been more excited for how it turned out! Don't they all look so cute! 


Back to School Goodies

The last thing I wanted to share today is my Back to School goodies! I love sending my students and coworkers off on the first day of school with a cheesy but fun treat! I absolutely love making them and I really think it helps me show how truly thankful I am to get to spend a school year with them! In the past, I've sent my students home with packets of teddy grahams that say, " I am beary excited to have you in my class" but this year I sent my amazing fiancé to the store to get them and they were ALL gone! He went to four stores and finally just came home with Animals crackers! So he and I put our heads together and came up with an even cheesier tag! We added tons of animal puns to tell my students that "I'm WILD about having them in my class!"


Here you can see a picture of how they turned out! You can also see the highlighters that I gave to my co-workers! We're writing our WCEA document this year and figured we could all use another highlighter! I attached cute little tags with a little blue ribbon and dropped them in their school mailboxes! And because you managed to read all the way down to bottom of this crazy long post, I've posted these tags for free in my TPT store! I hope you enjoy them! 

Thanks so much for Reading! 

First Day of School 2016! 


SaveSave
SaveSave
SaveSave

Tuesday, June 7, 2016

Cursive Monsters!

There is something about the end of the year that always gets me so behind with blogging! I think its the First Communion preparation, end of the year testing and constant events that keeps me buzzing around! I'm definitely going to have to do some catch up posts this summer!


But for now... check out these silly cursive monsters that we created during our end off the year rotations last week! As you can see, students used cursive and symmetry to create unique monsters! It's a great way to practice writing your name but can be used for any word! In the past we've made Cursive Vocabulary Monsters and had our monsters shouting out the definitions of our words! No matter what form, my kids just love them! In case you want to try them, I've listed the steps below.

Step 1: Fold one piece of computer paper "hot dog" style in half.

Step 2: Use a pencil to write your name as big as you can above the folded line in cursive.

Step 3: Sharpie your name and refold the paper.

Step 4: Take folded paper to the window and use a pencil to trace your cursive word on the back.


Step 5: Sharpie this new side, so that you have two symmetrical sides!

Step 6: Open it up, color it and add some fun eyes and/or embellishments!

There you have it! A cursive monster! Super easy and they all turn out so different. You can see the yellow monster below was written on the wrong side and still looks awesome! They're just a fun way to practice those handwriting skills, and keep the creative juices flowing as the year winds down! :)


Monday, January 18, 2016

An Introduction to Multiplication


Each year around Christmas time, my little Second graders begin begging me to learn multiplication!

It's funny to me... but Multiplication to them is seen as this big scary topic that makes you a Third grader. Because they're so excited to learn and challenge themselves, I love giving them an introduction to multiplication. It likewise allows me to continue challenging my higher performing students throughout the year in small groups, while giving my other students who are still struggling with 3 digit addition and subtraction a little taste of third grade confidence.


I always start my very first day with multiplication by using m&m's. Using Candy as a manipulative for Math makes the lesson seem more exciting! And because I rarely use food in the classroom, it makes it special too!


This year because I have five students who are allergic to nuts, I also used skittles!

Students use the m&m's and skittles to create "groups of". They write down the mutliplication problems that coincide with the candy they created. We slowly learn that multiplication is equal groups and that there is a relationship between multiplication facts with the same numbers. For example, 3 groups of 5 and 5 groups of 3 equal the same amount of candy pieces. Here you can see a picture of one of my student's work stations.


Students tend to catch on extremely quickly when multiplication is presented this way. I lead them through about 6 or 7 problems together and then let them play around with the candy, making their own math problems! The discovery aspect helps solidify their learning. They write the ones they find on the white board in front of the classroom and we clap for all the awesome work they've discovered at the end of class.


The next day, we use colorful beads and our fun whiteboards to continue discovering multiplication. I found these amazing ping pong boards in the "dollar spot" at Target one day and used them for fun paddle white boards. Again I lead them through a few problems, making sure to introduce them to the multiplication rules of 0 and 1. I then again let them explore.


By using fun manipulatives and materials and by making multiplication into a discovery, it becomes fun and manageable. Students can immediately feel successful and excited to keep learning. It also gets them excited to start learning Division! 

I love how this student used his white board to beg me to keep learning! Gotta love 2nd grade spelling too! ;)


Friday, December 25, 2015

Merry Christmas!

As I sit curled up on the couch with my family,  I wanted to send out a short post wishing everyone out there in the blog world, a very Merry Christmas! I hope that everyone is enjoying a wonderful and relaxing Holiday!


Here you can see the adorable Christmas plates that my students created for their parent gifts! We used cheap plates from the dollar store and my collection of colored sharpies. I created a simple directed drawing for them to follow and my aide and I baked them in the oven for 30 minutes at 450 degrees! I hope that my students' parents enjoyed unwrapping them this morning, as much as we enjoyed creating them!


Now to sneak a Christmas cookie and read a little of my brand new, Ron Clark's "Move your Bus!" book before getting dressed for Christmas dinner!